How to Handle Units in Forms
Adding Units in Form Builder
When designing forms that collect numerical values, it's important to specify the units of measurement clearly and consistently. This ensures that everyone entering data interprets the field the same way and it enables downstream analysis, visualization, and automation to work correctly.
A best practice: Always include units for any measurement-based field, even if it seems obvious.
--
Option 1: Include Units in Property Title
This is the simplest and most common method for handling units in forms. By including the units directly in the field’s title, you make it immediately clear to the user what units to enter without requiring any extra configuration. However, this is also the most limiting because the users are required to enter values in the units specified in the title.
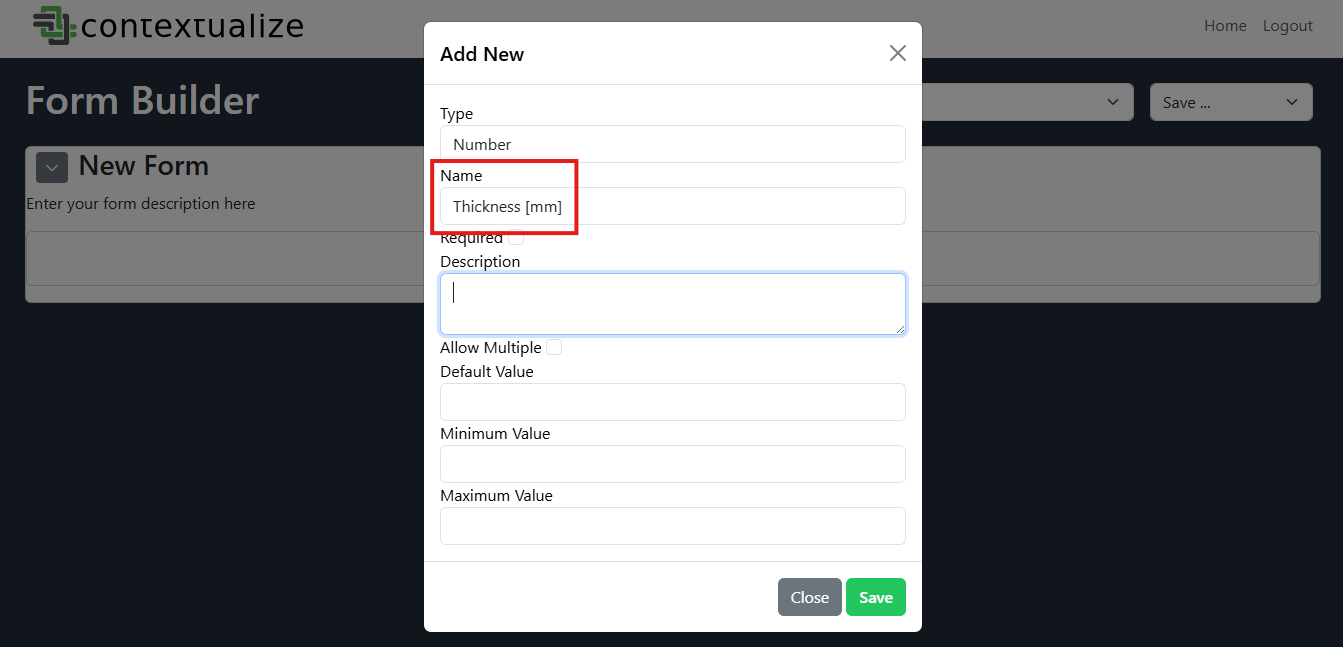
For example, instead of labeling a field "Thickness", use "Thickness [mm]".
⚠️ Avoid placing units only in the description.
The description is not stored with the submitted data meaning unit information will be lost in downstream usage.💡 Tip: When using this method, take advantage of the minimum and maximum fields in the schema when possible.
These boundaries not only improve data quality but also help guide users to enter values in the correct units.
This method works best when:
- You expect all users to use the same units
- The units are well-understood and unlikely to change
- You want a fast and simple setup
--
Option 2: Include Dynamic Unit Select as a Section
This option is more complicated to design, but is more flexible and scalable, especially when:
- The same field may be reported in different units
- You want to allow for unit conversions or automated normalization later
- Your form is used across teams or instruments with different conventions
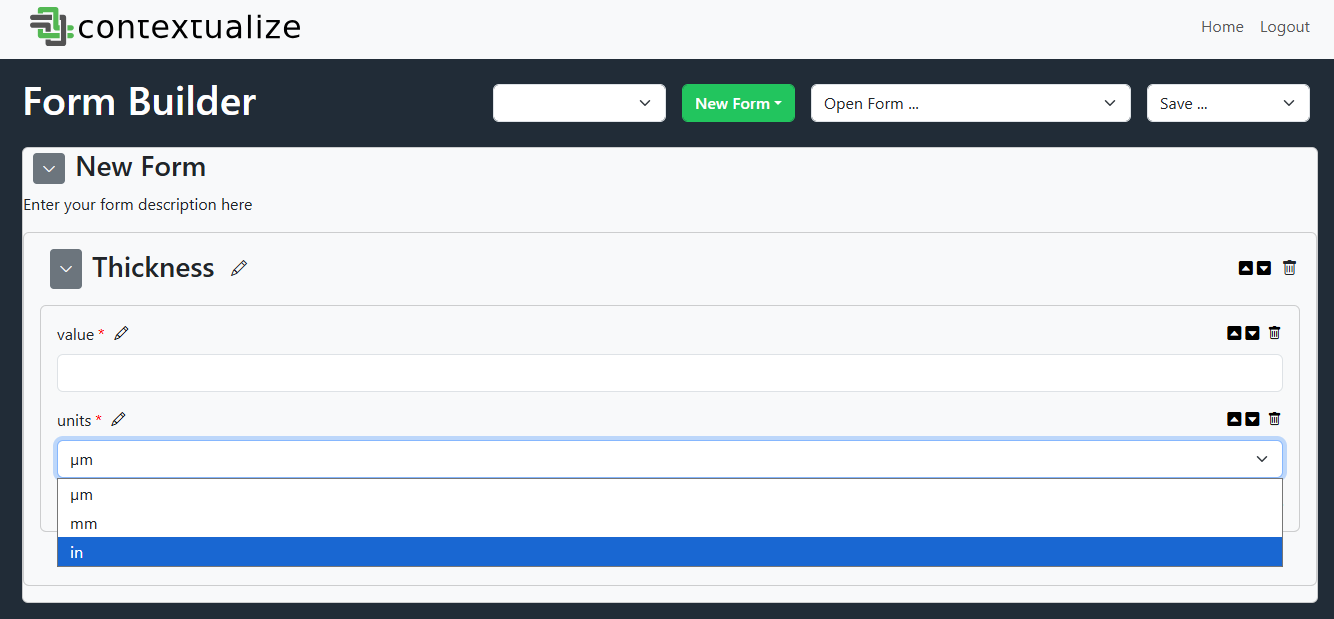
In this approach, you separate the numeric value and the unit into two fields grouped in a section, for example:
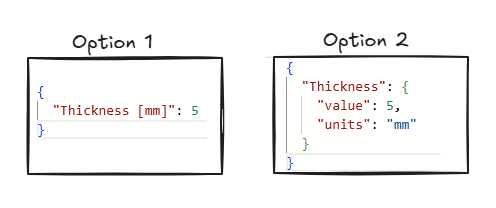
Thickness Value(number)Thickness Units(enum with values like"µm","mm","in")
Since this option is a little more complicated to set up, let's walk through how to do it.
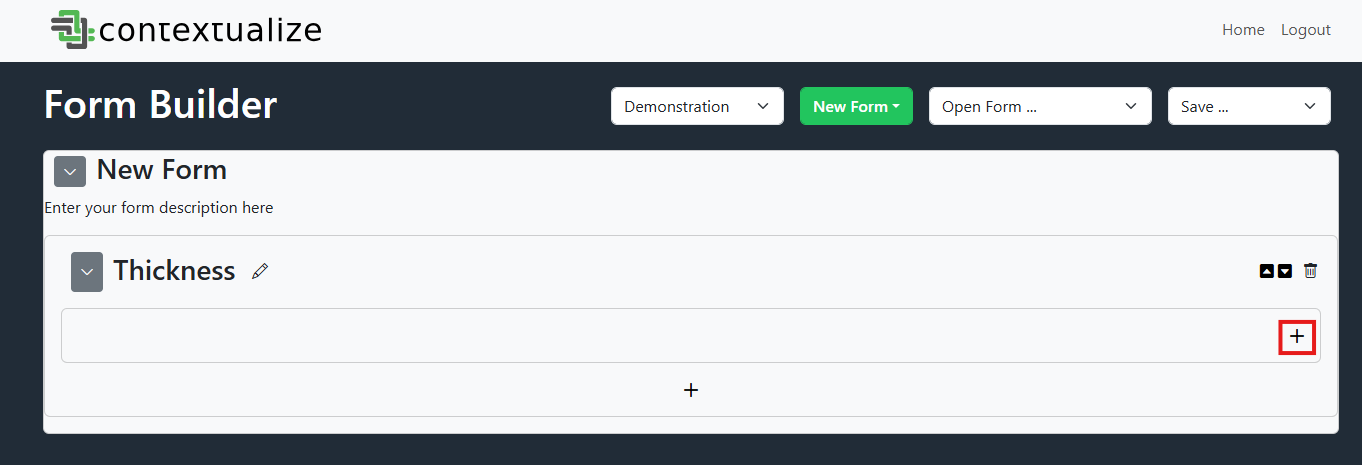
1. Create New Section
In Form Builder, create a new property by clicking the "+" as outlined in the Form Builder Step-by-Step Guide.
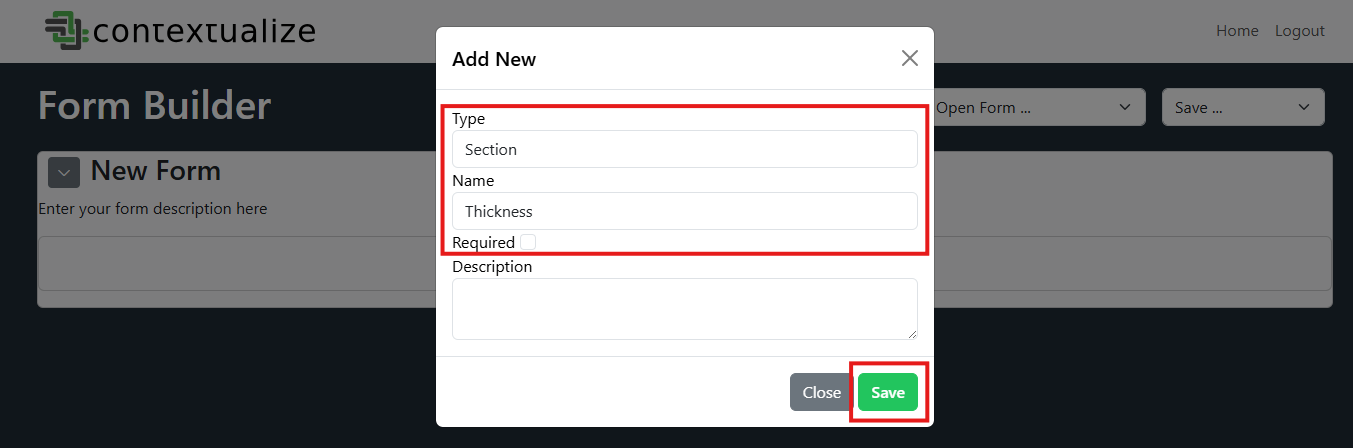
Select Type: Section with Name of your measurement property (e.g. "Thickness") and Save.
2. Add Property Inside Section
Select the "+" button inside the section you just created
3. Create 'value' Property
This property will be your value (e.g. the measured Thickness). Select the appropriate Type (likely, a number), Name the property (e.g. 'Thickness Value' or, simply, 'value'), then hit Save.

Note: Because the section title is your property name (e.g. Thickness), you do not need to include the name in the value and units properties.
💡 Tip: You can mark both fields as required to ensure users enter both a value and a unit.
4. Create 'units' property
Repeat Step 2 to create a second property inside the section.
This property will be your unit select property. Select Type: Enumeration to make sure the property is a drop-down menu and Name the property (e.g. 'Thickness Units' or, simply, 'units')
Now, fill out the Enum (comma-separated values) field with any desired or commonly used units that you would like to make available to users - as a comma-separated list.
When complete, hit Save

With these 4 steps, you have created a property with dynamic unit selection for your users.
--
Resulting Form Data
Below is an example of the resulting submitted form data for each option.